Tuesday, November 13, 2012
Monday, November 12, 2012
November 2012 Stamp Club
One make-n-take at the November Stamp Club meeting was this ribbon tree card. Punch out the ribbon with the Holiday Collection Framelits. Attach ribbon to the back, and then a Champagne Glimmer Paper star! A perfect little (3 x 3) gift tag or note card!
Circle Circus is the highlight of this card. Stamp the images, punch out, and then layer on some River Rock card stock. And, of course, add a little shine with Champagne Glimmer paper! The 'thank you" stamp is a single stamp (and also available as a set).
This snowman is WAY more excited about the coming snow than I am!! Punch 3 circles, sponge with Early Espresso, and attach to some Core'dinations card stock that has been embossed with the Northern Flurries embossing folder. The nose is made by using the edge of a square punch. Make the scarf by attaching a small piece of ribbon around the middle circle. Then flip a larger piece of ribbon over that (or tie a knot and attach with glue dots).
Happy Stamping!
Patrice
Circle Circus is the highlight of this card. Stamp the images, punch out, and then layer on some River Rock card stock. And, of course, add a little shine with Champagne Glimmer paper! The 'thank you" stamp is a single stamp (and also available as a set).
This snowman is WAY more excited about the coming snow than I am!! Punch 3 circles, sponge with Early Espresso, and attach to some Core'dinations card stock that has been embossed with the Northern Flurries embossing folder. The nose is made by using the edge of a square punch. Make the scarf by attaching a small piece of ribbon around the middle circle. Then flip a larger piece of ribbon over that (or tie a knot and attach with glue dots).
Happy Stamping!
Patrice
Tuesday, October 30, 2012
October 2012 Stamp Club
This quilt card was a make-n-take at the October Stamp Club. Layer 2 pieces of cs that are 2 5/8" (one is a square and one is a triangle). Punch 4 pieces of cs and 4 pieces of DSP with the 1 1/4" square punch. Attach a piece of DSP so it is in the top point. Don't use a lot of adhesive because you'll need to get some cs under it later. Go counterclockwise around the quilt base, attaching cs or DSP so it is in the pointy part of the quilt base. When you get to the last piece, slide it under the first piece of DSP. It sounds much harder than it actually is!
This spooky spider card was also a make-n-take! Love those wiggly eyes! Ink up the embossing folder with ink (we used Whisper White Craft) before you run it through the Big Shot to get this effect.
The card, above, was a make-n-take using the 1 1/4" scallop circle punch. The strips of paper are all 1 1/8" wide. The lengths are: 3 7/8", 3 1/8", 2 1/8". The strips of paper are attached with dimensionals. The scallop circles are attached directly to the card.
The other cards you see are alternatives to the make-n-takes. Just changing the colors of a card makes it look totally different!
Happy Stamping!
Patrice
This spooky spider card was also a make-n-take! Love those wiggly eyes! Ink up the embossing folder with ink (we used Whisper White Craft) before you run it through the Big Shot to get this effect.
The card, above, was a make-n-take using the 1 1/4" scallop circle punch. The strips of paper are all 1 1/8" wide. The lengths are: 3 7/8", 3 1/8", 2 1/8". The strips of paper are attached with dimensionals. The scallop circles are attached directly to the card.
The other cards you see are alternatives to the make-n-takes. Just changing the colors of a card makes it look totally different!
Happy Stamping!
Patrice
Sunday, October 21, 2012
Paula's party October 2012
For this make-n-take, we used Natural Composition Specialty paper for the background. It's such pretty paper! It is embossed in clear and adds a special touch to the card. I love the way the Gossamer Lace stamp can be used in so many ways!
The other make-n-take we did at the party was a quick and easy card made with Howlstooth and Scaringbone DSP from the Holiday catalog. The DSP adds so much that a small stamped image (from Mixed Medley-hostess) and some Basic Black taffeta ribbon was all that was needed to finish things off! As you can see by the samples below, just changing the DSP makes this card design very versatile!
On the card (above) that I demonstrated, I used a blender pen to add some color to the inside of the leaf (Lacy and Lovely). I stamped Thank You on the 7/8" cotton ribbon from the Holiday catalog. A little sanded Core'dinations Early Espresso cs and some Basics Glimmer brads finished it off!
Happy Stamping!
Patrice
The other make-n-take we did at the party was a quick and easy card made with Howlstooth and Scaringbone DSP from the Holiday catalog. The DSP adds so much that a small stamped image (from Mixed Medley-hostess) and some Basic Black taffeta ribbon was all that was needed to finish things off! As you can see by the samples below, just changing the DSP makes this card design very versatile!
On the card (above) that I demonstrated, I used a blender pen to add some color to the inside of the leaf (Lacy and Lovely). I stamped Thank You on the 7/8" cotton ribbon from the Holiday catalog. A little sanded Core'dinations Early Espresso cs and some Basics Glimmer brads finished it off!
Happy Stamping!
Patrice
Halloween Bag
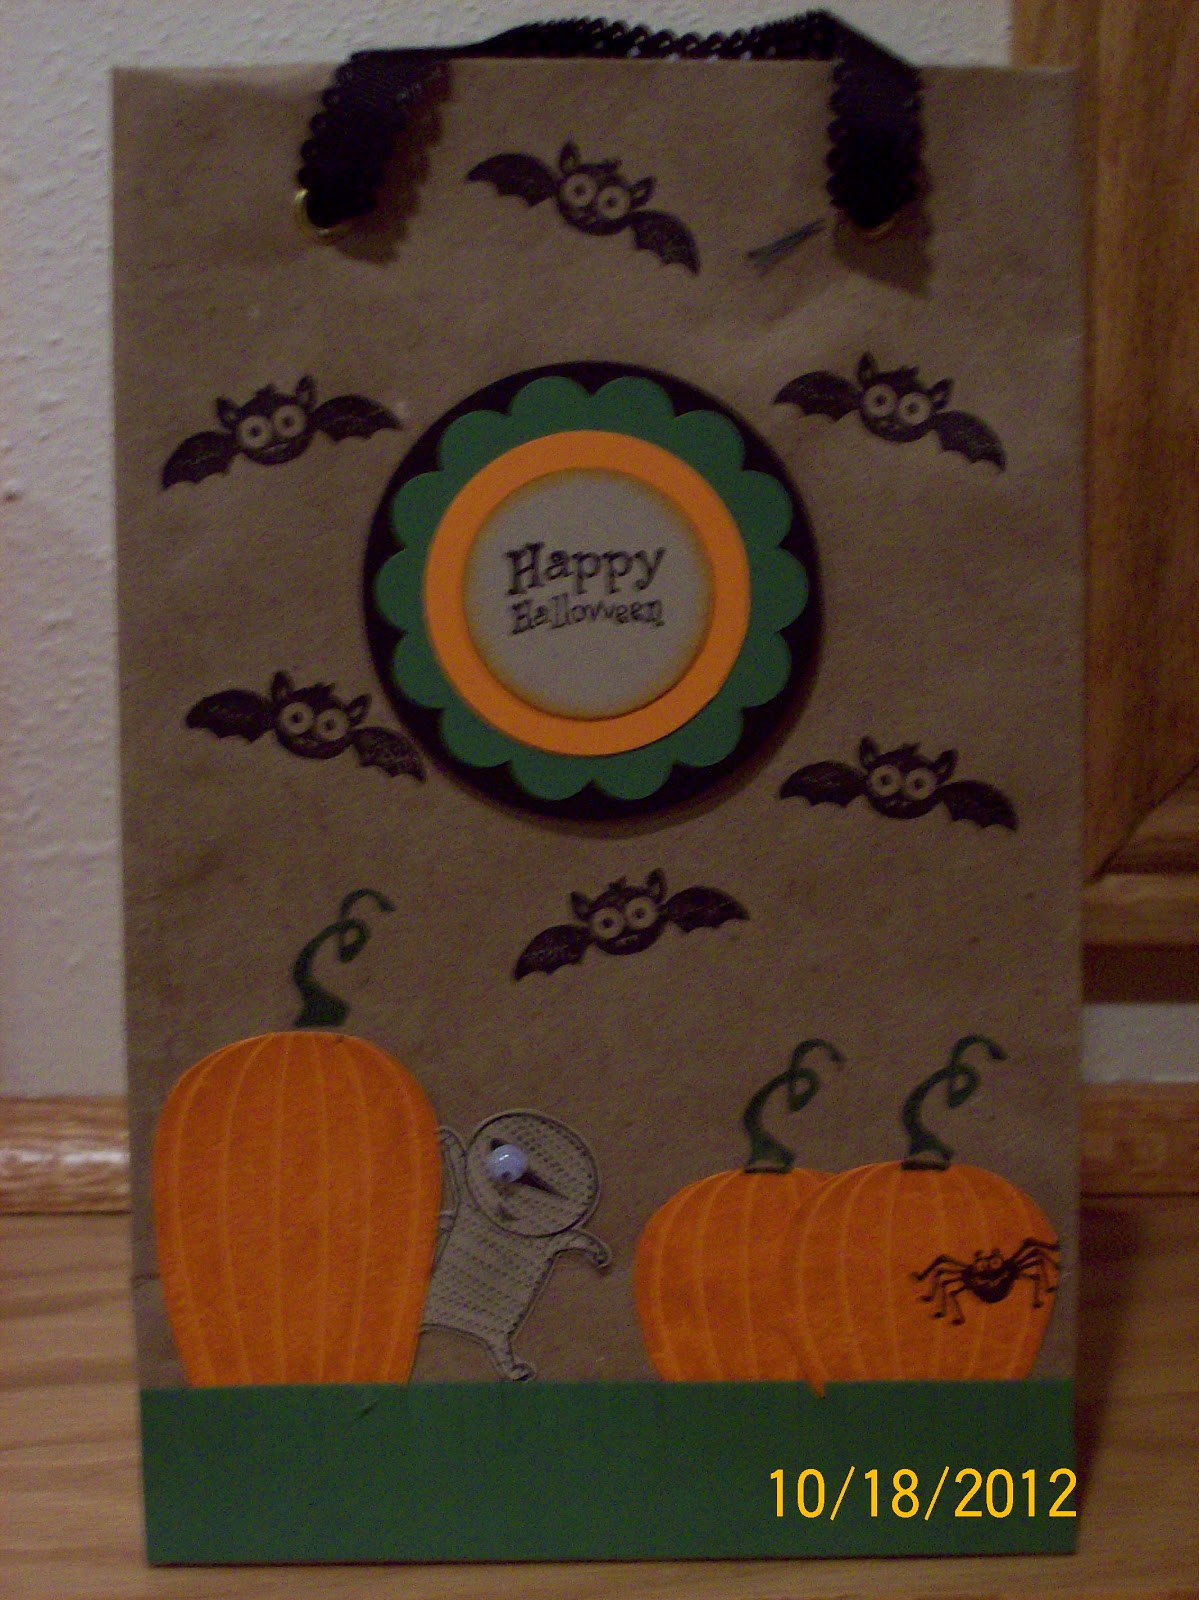
My mother-in-law asked me to make some Halloween bags. She doesn't have any trick-or-treaters stop by, but she does have a few grandchildren in the area that always visit and say, "Boo!" to Grandma on Halloween! Todd and I went to Target and found these bags. I removed the bright pink ribbon and replaced it with a more Halloweeny black. Then I stamped away! The pumpkins and words are retired and the bats and googly-eye guy are from the Googly Ghouls set in the Holiday catalog. For the grass I just cut a 1 1/2" strip of Garden Green and sniped the top. They looked so cute on the shelf I had them on, I almost didn't want to give them to her! :)
Subscribe to:
Posts (Atom)