Tuesday, December 8, 2015

Stamping Fun Night December 2015

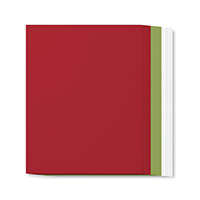
I demonstrated this card with oh-so-pretty Holidays Fancy Foil Vellum that's in the Holiday catalog.  I love how it sparkles.  AND that it isn't cold at all!! Here's the supply list:
stamps:
*Happy Scenes
paper:
Lost Lagoon
Whisper White
*Holidays Fancy Foil Designer Vellum
ink:
Smoky Slate
Lost Lagoon
StazOn jet black
accessories:
medium envelope- Whisper White
metallic foil doilies
ribbon- 1/8” silver
dazzling details-silver sparkle
blender pen
dimensionals
mini glue dots


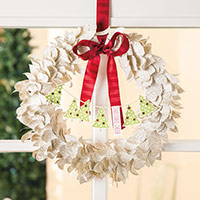
This quick and easy card looks fancy because of the pretty Designer Series Paper (DSP).  It's called Season of Cheer and makes you think of Christmas, but take another look at those designs and you'll be seeing birthday cards and anniversary cards and...!  Here's what we used to make it:
stamps:
Watercolor Words
paper:
Hello Honey
Night of Navy
Whisper White
*Season of Cheer Designer Series Paper
ink:
Night of Navy
accessories:
medium envelope- Whisper White
*Iced Rhinestone Embellishments
paper snips


Happy Winter!  Snowflakes aren't really purple, but sure look nice stamped in purple!  Here's what we used to make this:
stamps:
*Flurry of Wishes
*Happy Scenes
paper:
Blackberry Bliss
Rich Razzleberry
Whisper White
ink:
Blackberry Bliss
accessories:
medium envelope- Whisper White
*Happy Haunting Designer Washi Tape
*ribbon-Into the Woods
*Winter Wonderland Embellishments
punch- ½” circle
stamping sponge
mini glue dots
dimensionals

* = Holiday catalog

Stamping Fun Night was a lot of fun again!  I even had a bonus card everyone could make.  See the post from earlier today to see the card AND a whole bunch of cards I was inspired to make over the weekend once I started playing with the Wonderland stamp set!  

Happy Stamping!
Patrice


Wonderland cards

Here is the bonus card we made at the December Stamping Fun Night.  It was inspired by the card, below, that I found on Mary Fish's website (stampinpretty.com).  I loved the clean layout and how quick and easy it looked.


Well, after I got started with that card, it was hard to stop me!  I made all of these cards this last weekend, using the inspiration I got from that one card!  My to-do list did not get done (Oh well!),but I had a ton of fun coming up with different takes on the same card.  I hope these cards inspire you to get stamping!


Happy Stamping!
Patrice

Tuesday, December 1, 2015

Designer Series Paper Scraps


I had some scrap pieces of Designer Series Paper (DSP) that were calling my name.  There wasn't enough there to make a stack of the same cards, but I knew I could make some quick and easy cards.  I hope you get inspired to dig into your scraps of paper and come up with some quick and easy cards, too!

Happy Stamping!
Patrice

Sunday, November 22, 2015

Christmas Card Change


I had extra card stock cut for the Christmas card on the left, but, I don't need anymore Christmas cards. So I grabbed the Watercolor Words stamp set and changed the card into a Just for You card!  I used the exact same materials (except the rhinestone) and made a completely different card!  I love the way it turned out!  I always give my mom and MIL a pack of cards for Christmas and they will each get some of these!

The flower in the middle is fussy-cut, and really seemed to finish it and make the flower pop. The next time you see a card you like, but don't have the same stamp set or whatever, do what I did.  Take the design and make it into something new!

Happy Stamping!
Patrice

Tuesday, November 17, 2015

November 2015 Stamping Fun Night

This quick and easy Silent Night card is made with the Jingle All the Way stamp set and Sleigh Ride Edgelits (available as a bundle!).  The Winter Wonderland Specialty Paper adds a great nighttime effect with the black and white.  Do you love the sparkle of the Winter Wonderland Embellishments??


For this make-n-take, we used the Project Life Seasonal Snapshot set along with some Iced Rhinestones.  Crushed Curry, Always Artichoke, and Cherry Cobbler come together to make a great Christmas card!


It's still officially fall, so we can still enjoy the beautiful fall colors on the Into the Woods Designer Series Paper (DSP)!  We only needed one ink color (Tangelo Twist) for the image from Thankful Forest Friends.  Some washi tape from the Happy Haunting Washi Tape pack, and a leaf from Into the Woods Elements finish everything on this card.


Many of the products on these cards are retiring from the Holiday catalog.  Get them before they're gone!  Accessories are just while supplies last!  See the list of items retiring from the Holiday catalog here.  Just scroll down to the retiring list.  I would be happy to email you the list, also!

And this week's Weekly Deals (November 17-23) are:

Weekly Deals
Show: 
Sort By: 
Jolly Christmas Wood-Mount Stamp Set by Stampin' Up!
JOLLY CHRISTMAS WOOD-MOUNT STAMP SET
Price$27.00 $20.25
Season of Cheer Cardstock Pack by Stampin' Up!
SEASON OF CHEER CARDSTOCK PACK
Price$7.00 $5.25
Season to Season Wreath Project Kit by Stampin' Up!
SEASON TO SEASON WREATH PROJECT KIT
Price$27.00 $20.25
Snow Friends Framelits Dies by Stampin' Up!
SNOW FRIENDS FRAMELITS DIES
Price$27.00 $20.25


We had a fun night stamping and visiting at Stamping Fun Night!

Happy Stamping!
Patrice


Sunday, November 8, 2015

Pat's Party- November 2015

The card, above, is made with the Wonderland stamp set and Teeny Tiny Wishes stamp set.  The gold "snow" is gold Stampin' Glitter attached with dots of Two-Way glue.  A little Winter Wonderland Specialty Paper and some Gold Glitter Ribbon (both from the Holiday catalog) give a little sparkle!  I think Mossy Meadow and Cherry Cobbler are a great Christmas color combo!


This card is quick and easy with the Notecards and Envelopes!  The stamps are from the Seasonal Snapshop set in the Holiday catalog.  I had both of the words (Merry and Christmas) attached to the same clear block.  It made it easy to stamp them how I wanted them, over and over!  We did a little sponging on the edges of the white card stock, added some Season of Cheer 
Designer Series Paper (DSP) and popped out the words with dimensionals.  Colors used: Mossy Meadow and Cherry Cobbler!

Notecards can be mailed with a regular stamp!  To use a regular stamp the envelope must be rectangular, and at least 3 1/2" x 5".  The Notecards and Envelopes in the Stampin' Up catalog fit these requirements!


The other card we made came from the Watercolor Wishes Card Kit.  This kit has everything you need (except adhesive- glue stick or double sided tape, etc).  You can use the ideas exactly as shown in the kit, or play around and make your own design!  And when the supplies are used up, you still have the ink and stamps to make more cards!

Happy Stamping!
Patrice

Friday, November 6, 2015

November 2015 Stamp Club

The snowflake was stamped on a window sheet with StazOn.  Then I flipped it over, added Crystal Effects, a few drop of reinker, and some glitter.  Mix it around, and put some tissue paper on the back.  After it dries (overnight) cut off the extra tissue paper and attach to the card.


The beautiful Holidays vellum in the Holiday Catalog was used on this card.  And Crystal Effects was used put on a piece of card stock, and a little glitter was sprinkled on.  It's a great "button"!


Make your own stamp pad!  Fold up a baby wipe, put some drops of reinker on it, and press your stamp into it.  It's a quick and easy way to get color on this Give Thanks card!


Vellum from the Holidays vellum pack was stamped with StazOn.  Add adhesive to the back of the red striped to adhere it to the Real Red cardstock.

It was a fun night of stamping!

Happy Stamping!
Patrice

Thursday, October 1, 2015

October Stamp Club


Glassine sheets and some ink make this glassine bag look like candy corn.  Yum!!


We did the glitter splatter technique on this card.  Put Multipurpose Liquid Glue in a small conatiner, use the AquaPainter and a good amount of water and mix together.  Sprinkle on the card stock, and then pour glitter on.  A little sparkle!!


A fall card with lots of cute things from the Holiday Catalog!


The ombre technique was used on this card.  We cut a wavy line in a window sheet and put it on the card stock.  We sponged similar colors on, moving the card stock between each color.  

It was great to get together with Stamp Club!

Happy Stamping!
Patrice

Tuesday, September 22, 2015

Christmas Stamp-A-Stack

You will make one of these at the Christmas Stamp-A-Stack.


You will make 3 of these at the Christmas Stamp-A-Stack.

You will make 3 of these at the Christmas Stamp-A-Stack.


You will make 3 of these at the Christmas Stamp-A-Stack.


The Christmas Stamp-A-Stack will be Monday, October 12th from 6:00 - 8:00.  The cost is $20 and is due on or before Friday, October 9th.

Early Bird Special: Register and pay on or before Saturday, October 3rd and the cost is just $15!!

I hope to see you there!  

Happy Stamping!
Patrice

Friday, August 7, 2015

August 2015 Stamping Fun Night

First, I want to show you some cards that we DIDN'T make at Stamping Fun Night last night.  I finally decided to get the Guy Greetings stamp set.  It's been on my wish list for a while, but that muscle man just threw me.  I couldn't figure out what I'd ever do with that stamp!  Since the stamp set is packed with lots of other great stamps, I decided to get myself some Guy Greetings.  I was telling the people that came to Fun Night about the muscle man and how I couldn't figure out what to do with that stamp.  Well, someone said they made a card with this guy, and I had to search and see what kind of ideas I could find.  Maybe he has more potential than I gave him credit for!  He looks so much better on the front of a card than he ever looked to me just sitting on a wood block.  Here are some of my favorite finds:


And if the muscle man still isn't your kind of stamp, there's an anchor, car, hats, tools, shoes...and lots of words.  If you use muscle man or not, this stamp set will solve your, "I need a manly card!!" needs.


The card we made at Fun Night (above) with the Guy Greetings set was a CASE from a swap I got at the Stampin' Up Convention.  I love to Copy And Share Everything!  Some Corrugated Cardboard and the Brick Wall embossing folder give it some depth and contrast.  I'm always looking for a good "guy" card and this is one I'll be making often!  And maybe I'll even get that muscle man on a few of my cards, too!  ;)


We made this teeny card that's just 2" x 2"!  The Envelope Punch Board was great for making an odd-sized envelope.  These little cards are great for a gift tag, to stick in a lunch box, or just a quick little hello to someone you care about!  The envelope paper is 4" x 4" and is scored/punched at 2".  


On this Blushing Bride card we used the Stampin' Spritzer to spritz the Neutrals Color Collection  Designer Series paper (DSP) to give it a little extra color.  Then we took the tube out of the bottle and flicked it to make splatter on the Whisper White and Blushing Bride card stock.  The card base is THICK Whisper White card stock, perfect for the cards you make with a white base.  It stands up nice and tall!

We had lots of fun stamping, talking, laughing, and snacking!  We had cookies that my mom made, and banana bread that Todd's mom made.  I told both moms that their treat was a hit!  There's nothing like some of Mom's baking to make you feel happy!

Happy Stamping!
Patrice


Tuesday, June 30, 2015

June 30, 2015 Stamping Fun Night

stamps: Build a Birthday
paper: Blushing Bride, Basic Gray, Watermelon Wonder
ink: StazOn jet bl;ack
accessories: medium envelope-Very Vanilla, punch- Triple Banner, 2-Way Glue Pen
TIPS:
Punch the long strips of Blushing Bride and Watermelon Wonder.  Then stick the long strip in again and punch to make the arrows.


stamps: Watercolor Wings 
paper: Lost Lagoon, Soft Sky, Whisper White
inkLost Lagoon, Soft Sky, Pear Pizzazz
accessories: Square Envelope, Big Shot, Butterflies Thinlits, mini glue dots, metallic thread-silver


stamps: Watercolor Words
paper: Thick Whisper White (100#), Real Red
inkReal Red, Night of Navy
accessories: medium envelope-Whisper White, white perfect accents
TIPS:
-Use metallic sharpies to color the perfect accent. Regular Sharpies will work, too!
-Stamp the word first, and then the stars.

This quick and easy card has many variations!  


It was a fun night of stamping!  

Happy Stamping!
Patrice

Saturday, June 27, 2015

June 2015 Paper Pumpkin

 The June Paper Pumpkin box (Happy Thoughts) has been sitting in my stamping room for a few days.  I finally took some time to play with it today!  I made one of each of the cards it gives directions for.  They are adorable cards, and if you use the supplies to just make those cards, you will have 8 fabulous cards!  But I wanted to play around a little more and see what else I could make.  I used a few extra supplies to make the cards below:
Ink- Calypso Coral, Bermuda Bay, Wild Wasabi
Paper- Bermuda Bay, Wild Wasabi
Accessories- stamping sponge, 3/4" circle punch, mini glue dots, a few extra envelopes

I wanted to see what I could come up with before I checked out Pinterest.  I hope you enjoy the 10 other cards I came up with!  It was fun to play around with the stickers, wood pennants, etc.


And the great thing is, I still have the stamp set and Tip Top Taupe mini ink pad to play with.  Or, I can get a refill of the supplies!  

Would you like to join Paper Pumpkin?  Go to www.mypaperpumpkin.com and sign up today!  You'll get a box of stamping fun in your mailbox each month.  Want to skip a month?  No problem!  Just let Paper Pumpkin know by the 10th of the month.

Happy Stamping!
Patrice


Monday, June 15, 2015

Planning for Back to School!


Each school year I decorate my plan book.  I'm old-school and I do an old-fashioned one, not one on the computer!  Well, my plan book is done for next school year!  Except for the dates, and the plans... Well, at least the cover is ready!  I plan to fill it will lots of fun stuff for my firsties next year!

Happy Stamping!
Patrice