Friday, May 22, 2009

Bloggers Challenge- Patriotic


The Bloggers Challenge for this week is Patriotic.  It really got me thinking about summer and warm days!  Since I completely forgot to do last week's challenge, I decided to combine them.  Last week was CASE yourself.  So I took a card I had in my stash (which I actually made at a demo shoebox swap a while ago) and changed the bottom color and the stamp set.  The top card is for this week's challenge, and the card below is the card I already had. 

Here's what I used on the 1st card: 
stamp set: Warm Words 
paper:Real Red, Night of Navy, Whisper White 
ink: Craft white 
accessories: hemp twine natural, Real Red 1/4" grosgrain ribbon, Night of Navy 1/4" grosgrain ribbon 


Monday, May 18, 2009

Retirement gift tag


I made this tag for the teachers in my school district that are retiring this year.  They will be tied to a little bag with chocolate coins in it.  I printed the words on Very Vanilla card stock and then ran them through the Big Shot with the Top Note die.  It took a little doing to make sure the words were centered, but once I figured it out it went pretty fast.  The pencil is from the retired set Elementary Days.  I used a Cameo Coral, Going Grey, More Mustard, and Basic Black marker to color the pencil stamp.  I sponged around the outside with More Mustard.  I hope they enjoy them and have a great retirement!

Wednesday, May 13, 2009

May Marker Club


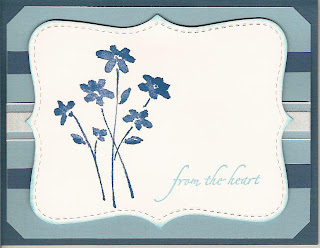
These are the cards we made at the May Marker Club. This Club is a great way to get the entire set of markers while spreading out the payments over 4 months. If you are interested in joining a Marker Club (or Stamp Club, or ribbon club, etc), just let me know! The card above was made by coloring directly on the stamp with markers, and then taking a fine-mist spray of water and misting it on the stamp. When you stamp the image, it gives it a nice watercolor look. Confetti White card stock is great for this technique because it soaks up just enough water so you don't have to wait so long for it to dry. There is some vellum paper in the background, also.


For the card below we did the thumping technique. It actually works better when you ink up the stamp with a lighter color ink, but I chose Ruby Red. Definitely not a light color! But the technique still works and it's fun to play around and break the stamping rules sometimes! It's easy to do. Just ink up a solid stamp. Then take a marker in your hand and hold it loosely in your hand like you would a chopstick. Then thump it on the stamp a few times. You can even do this with multiple colors! I always scribble with my marker a little after I do this in case there is a little ink from the stamp on the marker.


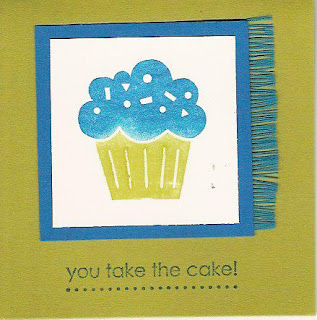
Doesn't it look like confetti on this card?! To make this background, run a marker (or 2 or 3) all over a brayer. I did squiggly lines all over, but you could also try shapes. Then roll it over your card stock. To clean the brayer, simply run it under water and dry with a paper towel. The cupcake stamp was also colored using markers. We added a little glitter to the candle to give it a little extra shine!

May Stamp Club

These cards were made when the Stamp Club met on May 11th. This first card uses those cool window sheets in the Occasions Mini. It was quick and easy, and the window sheets are so fun to work with! Someone asked about embossing on window sheets. I was 99% sure it would be ok. Well, I tried it tonight and I didn't have any problems with the window sheet melting or warping. Yeah! I even kept the heat on a little longer than needed and still had no problems.
This next card uses Watercolor Wonder Crayons and a blender pen to color in the flowers. The belnder pens give you just a little more control of the amount of moisture. So, if you have trouble with colors bleeding when you use an AquaPainter on more detailed images, you may want to try this. The polka dot background was made by inking up a brayer, rolling it on a texturz plate, and then running it through the Big Shot with the card stock. The texturz plates are cool by themselves, but with a little ink on them they really pop!

This card was a make-n-take. We used the Color Spritzer Tool and a Chocolate Chip marker on the scallop circle. The Pacific Point fringe was made by trimming off the edge of the Pacific Point ribbon and pulling the loose edges. Is that cool or what?! I learned that trick at the SU Regionals in Minneapolis (one of the many reasons I love being a SU demonstrator!).

But don't throw that ribbon away once you pull out the fringe! This 3 x 3 gift card uses what's left of the ribbon once you pull out the strings for the fringe. It's a quick and easy way to get coordinated fringe!

For the last make-n-take the choice was either a 3 x 6 card or 6 x 6 scrapbook page. Both projects use the sneak-peek Jumble Alphabet stamp set. I love this set, plus it's 20% off through the end of May!! So, rather than wait until the new catalog comes out in July and paying $43.95 for this set, you could get it now for $35.16. You could even order it online right now by clicking on the link to my SU website!

Happy Stamping!

Friday, May 8, 2009

Bloggers Challenge-Mother's Day

outside of card:

inside of card:

This week’s Blogger’s Challenge is all about Mother’s Day! I just got the Close as a Memory set and wanted to use it right away. I think those flowers are so pretty! I needed some inspiration, so I went to splitcoaststampers.com. I found a great card by atsamom and was on my way!

I sent my mom and Todd’s (my hubby’s) mom this card along with a pack of cards. My mom stamps, but still loves to get the cards to send and for inspiration!

Here’s what I used:

stamp sets: Close as a Memory, Holidays and Wishes, All Year Cheer II (retired)

card stock: Not Quite Nave, Baja Breeze, Whisper White

ink: Not Quite Navy, Baja Breeze

accessories: organza ribbon, stamping sponge, stampin’ dimensionals, tag corner punch, Big Shot, Top Note die

Happy Mother’s Day to all of the mother’s out there!

Wednesday, May 6, 2009

NEW Birthday stamp set!

We made this 3" x 3" birthday gift card at my downline meeting tonight.  I was expecting people at 6:30.  I didn't have this card ready (or even have an idea for it!) at 6:00 but Todd said, "You can think of an idea with that set!" and I went down in my stamping room and got it together in 10 minutes!  Wow!  That doesn't happen very often!

This set is called On a Pedestal and will be in the new catalog in July.  I got it FREE by going to the SU Regionals seminar in Minneapolis and then doing a qualifying workshop within 2 weeks.  What a great way to get a stamp set!  It makes me love being a demonstrator even more than I already did!

Here's what I used:
stamp set: On a Pedestal
card stock: Lovely Lilac, Yoyo Yellow, Confetti White
ink: Close to Cocoa, Lovely Lilac
markers: Real Red, Close to Cocoa
accessories: ticket corner punch

Monday, May 4, 2009

Hello!


Would you like to make this card?  If you are coming to my Stampin' Up downline meeting on Wednesday, May 6th you will be making this!  If you aren't a SU demonstrator yet, it is a great time to sign up!  You can get the regular Starter Kit for $199, or the Scrapbook Starter Kit for just $75!!!  You don't have to be a scrapbooker to get the Scrapbook Starter Kit.  It includes less stamp sets and accessories (and therefore a lower price!), but also has a Simply Scrappin' kit and a Craft ink pad.

If you are thinking about becoming a demonstrator, or want to know more about it, contact me about coming to the meeting on Wednesday!

What do we do at a downline meeting?  We talk about stamping, of course!  Since we are all demonstrators we talk about fun things to do at workshops, ideas for Stamp Camps, etc.  We always do a stamping project, share ideas, and enjoy some treats.  It's fun to listen to different ideas from people that are hobby demonstrators all the way up to people doing Stampin' Up as a full-time job.

I got the idea for this card from the Stampin' Up! Regionals seminar I went to in April.  I did the letters with the new Jumble Alphabet stamp set.  This set is a sneak-peek from the 2009-2010 SU catalog.  And it's 20% off, too!  The regular price is $43.95 and the sale price is $35.16.

Happy Stamping!

Friday, May 1, 2009

Bloggers Challenge-May 1st


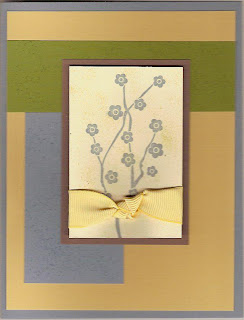
I didn't think I'd get my Challenge in this week, but I decided to stay up and get it done. Guess what? This card took 15 minutes from start to finish! I love it when that happens! This is a great sketch to try! It was quick and easy, and you can easily change the look with a different stamp or colors. Check out the other cards created for this challenge by clicking on the Bloggers Challenge picture.

Here's what I used:
stamp set- Eastern Blooms
ink: Bordering Blue
markers: Old Olive, Bordering Blue, So Saffron
card stock: Bordering Blue, Old Olive, So Saffron, Close to Cocoa, Confetti Cream
accessories: Color Spritzer Tool, stampin' dimensionals, So Saffron ribbon (from Sale-A-bration)